Introduction
Transforming your outdoor space into a personal oasis is one of the most rewarding aspects of homeownership. One of the most creative and expressive ways to enhance your yard is through DIY yard art. This art form not only adds character to your garden but also showcases your unique style and creativity. In this article, we’ll explore 15 unique DIY yard art ideas that you can try, each designed to infuse your outdoor area with charm and individuality. Whether you’re a seasoned DIY enthusiast or just starting out, there’s something here for everyone.
Benefits of DIY Yard Art
Creating DIY yard art comes with numerous benefits that extend beyond mere aesthetics:
- Enhances Aesthetic Appeal: Unique art pieces can make your yard stand out, drawing attention and admiration from passersby and guests.
- Encourages Creativity: Engaging in DIY projects allows you to express your personality and creativity in a tangible way.
- Cost-Effective: Many DIY projects can be done at a fraction of the cost of store-bought art, especially when utilizing repurposed materials.
- Recycling and Upcycling: DIY yard art often involves recycling materials, helping reduce waste while creating something beautiful.
Tips for Getting Started
Before diving into your DIY yard art projects, here are some essential tips to set you up for success:
- Assess Your Outdoor Space: Take a walk around your yard and determine which areas could benefit from art. Consider your garden’s style, color scheme, and the overall vibe you wish to create.
- Gather Materials and Tools: Make a list of the supplies you’ll need for each project. This may include paint, wood, metal scraps, tools, and any decorative elements.
- Plan and Design: Sketch out your ideas before starting. Planning will help you visualize how the pieces will look in your yard.
- Safety First: When working with tools, always prioritize safety. Wear gloves and goggles, and ensure you’re working in a well-ventilated area.
15 Unique DIY Yard Art Ideas
1. Upcycled Garden Sculptures

Description: Breathe new life into old tools, kitchenware, or metal scraps by transforming them into whimsical garden sculptures.
Instructions:
- Gather items like shovels, pots, and utensils.
- Use a sturdy base (like a wooden post) to create stability.
- Assemble your sculpture by securing pieces with screws or strong adhesives.
Personalization: Paint the sculptures in vibrant colors or leave them with a rustic finish. Add embellishments like flowers or glass beads for extra flair.
2. Painted Rock Art

Description: Use smooth stones as canvases for your artistic expression, painting them with colorful designs or inspirational messages.
Instructions:
- Select smooth, flat rocks.
- Clean the rocks and dry them completely.
- Use acrylic paint to create your designs and finish with a waterproof sealant.
Placement: Scatter your painted rocks along garden paths or integrate them into flower beds for a delightful surprise.
3. Colorful Flower Pots

Description: Turn plain flower pots into vibrant art pieces using paint or decoupage techniques.
Instructions:
- Choose pots made of terracotta or ceramic.
- Use acrylic paint or decoupage paper to apply your designs.
- Seal your creations with a weatherproof finish.
Use: Display your pots on patios or arrange them in clusters for a stunning visual impact.
4. Garden Wind Chimes

Description: Create soothing wind chimes using materials like shells, metal scraps, or even bamboo.
Instructions:
- Gather your materials and cut lengths of string or fishing line.
- Attach items to a central hanging piece (like a wooden ring) using the string.
- Hang the chimes in a location where the wind will catch them.
Sound: Experiment with different materials to achieve varied musical effects.
5. Mosaic Garden Stepping Stones

Description: Craft custom stepping stones using glass or ceramic mosaics for a colorful path through your garden.
Instructions:
- Mix concrete and pour it into a stone mold.
- Arrange mosaic pieces on top before the concrete sets.
- Allow to cure completely before removing from the mold.
Personalization: Use themes (like seashells or flowers) to make your stones reflect your style.
6. Wooden Pallet Art
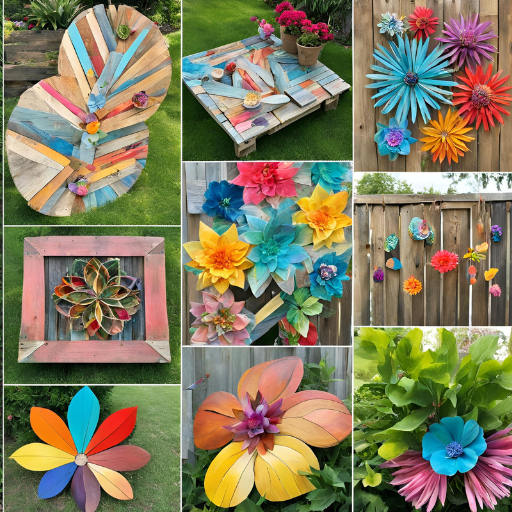
Description: Repurpose old wooden pallets to create rustic wall art or signs for your garden.
Instructions:
- Dismantle the pallet and choose boards of your preferred length.
- Sand the boards to avoid splinters.
- Paint or stain them, then arrange them into your desired shape.
Versatility: Use pallets for other projects, such as vertical gardens or trellises.
7. Birdhouses with a Twist

Description: Build unique birdhouses using unconventional materials or quirky designs.
Instructions:
- Choose your base materials (wood, plastic, or metal).
- Design the birdhouse, adding fun features like colorful paint or shapes.
- Ensure proper drainage and ventilation for the birds.
Functionality: Decorate with vibrant colors or patterns to attract feathered friends to your yard.
8. Hanging Garden Planters

Description: Make eye-catching hanging planters using recycled containers or wooden crates.
Instructions:
- Choose containers such as old teapots or wooden crates.
- Drill holes for drainage and hang using sturdy rope or chain.
- Fill with soil and your favorite plants.
Plant Suggestions: Consider trailing plants like ivy or petunias for a cascading effect.
9. Garden Flags

Description: Create personalized garden flags using fabric or canvas, perfect for showcasing your style.
Instructions:
- Cut fabric into flag shapes and paint or sew designs.
- Attach to a wooden stake or dowel for easy display.
- Use outdoor fabric paint for durability.
Display: Position them throughout your garden or along pathways for a welcoming touch.
10. Whimsical Garden Stakes
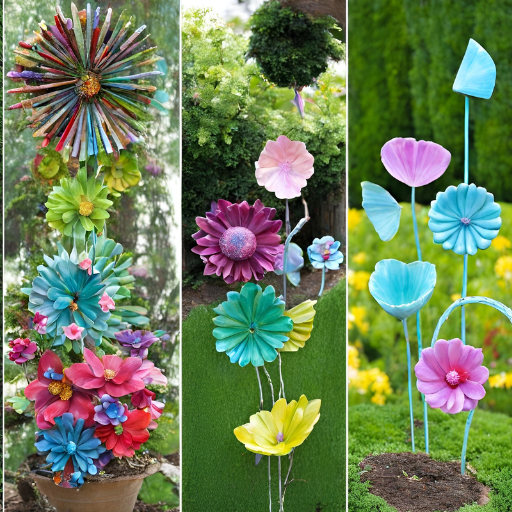
Description: Craft colorful stakes to add height and visual interest to your flower beds.
Instructions:
- Use wood or metal rods as your base.
- Decorate with paint, fabric, or even repurposed household items.
- Secure them in the ground among plants.
Personalization: Create themed stakes, such as whimsical animals or flowers.
11. Glass Bottle Edging
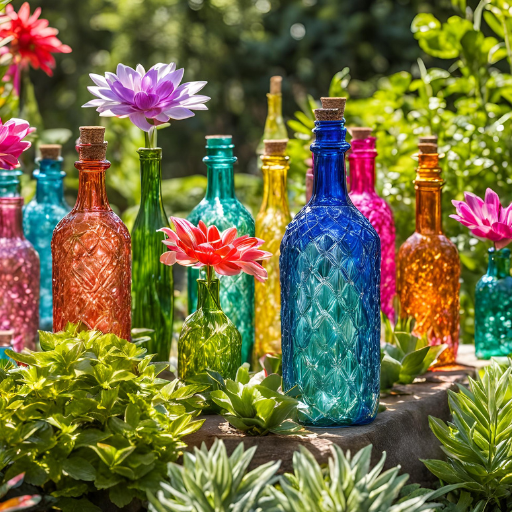
Description: Use colorful glass bottles to create a unique border for your garden beds.
Instructions:
- Collect a variety of glass bottles in different colors.
- Dig a trench along the edge of your garden and place bottles neck-down.
- Fill in soil around the bottles to secure them in place.
Aesthetic: Arrange the bottles to reflect your style—colorful patterns or a gradient effect can be stunning.
12. Recycled Tire Planters
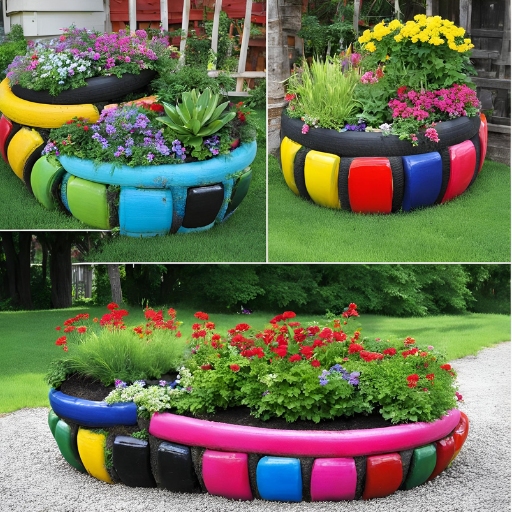
Description: Transform old tires into functional planters or creative art pieces for your yard.
Instructions:
- Clean tires thoroughly and paint them in vibrant colors.
- Stack or arrange them creatively in your garden.
- Fill with soil and plant colorful flowers or herbs.
Creativity: Use the tires for vertical planting or arrange them in fun shapes like animals.
13. Rustic Garden Bench
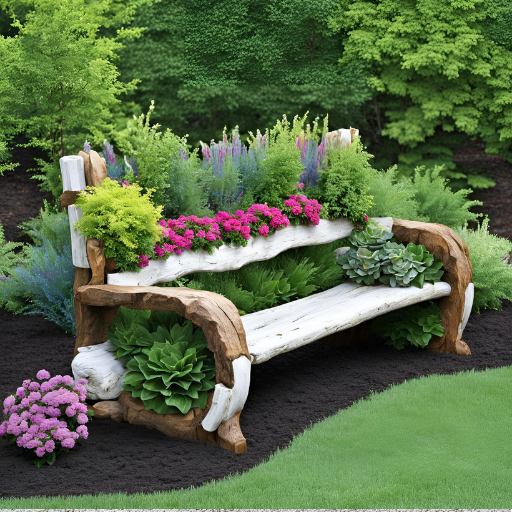
Description: Build a simple bench from reclaimed wood or pallets for a rustic seating area.
Instructions:
- Cut the wood into planks for the seat and legs.
- Assemble using screws or nails, ensuring stability.
- Sand and finish with outdoor varnish or paint.
Personal Touch: Add cushions or paint designs on the bench to match your yard’s theme.
14. Solar-Powered Garden Lights
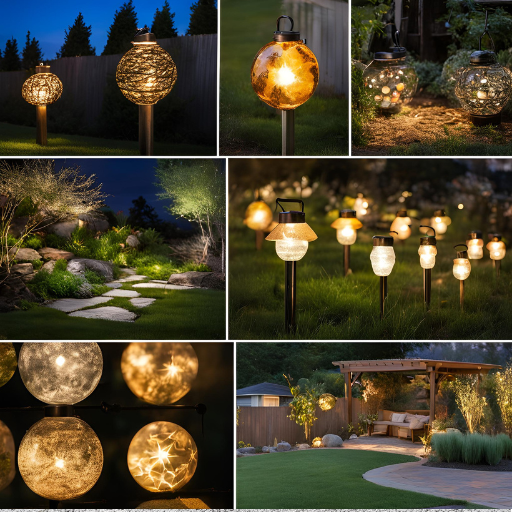
Description: Create decorative lights using solar lanterns or jars for a magical evening ambiance.
Instructions:
- Use mason jars or decorative containers and insert solar lights.
- Arrange them along pathways or hang them in trees.
- For a creative touch, paint the jars with glass paint.
Functionality: Solar lights are eco-friendly and provide illumination without the need for wiring.
15. Seasonal Yard Decor
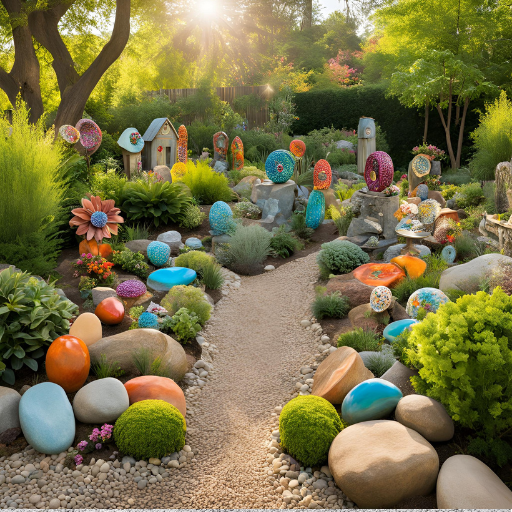
Description: Craft interchangeable decorations for different seasons (e.g., wreaths for fall, figures for winter).
Instructions:
- Choose materials that are durable and suitable for outdoor conditions.
- Create designs that reflect seasonal themes using paints, fabrics, and natural materials.
- Store off-season items in a dedicated space for easy access.
Storage: Use clear bins or labeled boxes to keep everything organized and easy to find.
Maintaining Your DIY Yard Art
To ensure your DIY yard art remains beautiful over time, consider the following maintenance tips:
- Weatherproofing: Use outdoor sealants or paints to protect your art from the elements. Regularly check for wear and touch up as needed.
- Regular Maintenance: Clean your art pieces periodically to remove dirt and debris. Check for any damage and repair promptly.
- Refreshing Your Pieces: Over time, you might want to refresh your art. This could involve repainting, rearranging, or even upcycling the piece into something new.
Conclusion
DIY yard art is a wonderful way to infuse personality and creativity into your outdoor space. The 15 unique ideas outlined in this article offer a variety of options that cater to different skill levels and artistic preferences. From upcycled sculptures to vibrant painted rocks, the possibilities are endless.
Embarking on these projects not only beautifies your yard but also allows you to express your individuality. So gather your materials, unleash your creativity, and start crafting your own unique yard art today!
Additional Resources
- Video Tutorials: For visual learners, consider checking online platforms for video tutorials that guide you through select projects step by step.
- Suggested Tools and Materials: Make sure to stock up on essential tools such as paintbrushes, saws, and safety gear to ensure a smooth DIY experience.
- Social Media Hashtags: Share your creations using hashtags like #DIYYardArt, #GardenDecor, and #CreativeGardening to connect with other enthusiasts and inspire others.
Call to Action
Which DIY yard art project are you most excited to try? Do you have any unique ideas of your own? We’d love to hear from you in the comments! Share your thoughts and photos of your creations, and let’s inspire each other to bring our yards to

