15 Halloween Crafts Little Kids Will Love

15 Halloween preschool crafts

Halloween crafts ; As Halloween approaches, it brings a wave of excitement for children and parents alike. The vibrant colors, playful costumes, and, of course, the endless array of treats make this season a perfect opportunity for preschoolers to engage in creative crafts. Crafting not only stimulates creativity but also supports the development of fine motor skills and enhances thematic learning. In this article, we’ll explore 19 fun and easy Halloween crafts that are perfect for preschoolers. Get ready to unleash your child’s imagination while making spooky decorations, fun treats, and unforgettable memories! Classic Halloween Crafts 1. Paper Plate Ghosts Materials Needed: Paper plates, black markers, white paint, string. Creating spooky ghosts from paper plates is a classic Halloween craft that can be easily personalized. Start by painting the bottom of a paper plate white, allowing it to dry completely. Once dry, let your child use black markers to draw ghostly faces, ranging from silly to spooky. For added fun, punch a hole at the top and string it up to create ghostly decorations that can hang in windows or doorways. 2. Pumpkin Paper Bag Puppets Materials Needed: Orange paper bags, green construction paper, glue, markers. Transform simple paper bags into adorable pumpkin puppets! Take an orange paper bag and cut out a green leaf and stem from construction paper. Glue the leaf and stem to the bag, and allow your child to draw a face with markers. These puppets can inspire imaginative play—encourage kids to put on a puppet show featuring Halloween stories! 3. Handprint Spider Materials Needed: Black construction paper, white paint, googly eyes. Celebrate the creepy crawlers of Halloween with a handprint spider craft. Have your child dip their hand in white paint and press it onto a sheet of black construction paper, creating a handprint that serves as the spider’s body. Once it dries, use the paint to add legs and glue on googly eyes. This craft not only looks great but is also a wonderful way for children to practice their hand coordination. Nature-Inspired Crafts 4. Leafy Pumpkins Materials Needed: Assorted leaves, orange paint, glue, and construction paper. This craft encourages outdoor exploration! Head outside to collect leaves of various shapes and sizes. Once you have a good assortment, have your child paint them orange. Once the paint is dry, glue the leaves onto a piece of construction paper to form a pumpkin. Discuss the different colors and textures of the leaves to enhance their learning experience. 5. Acorn Creatures Materials Needed: Acorns, twigs, and natural adhesives. For this nature-inspired craft, gather acorns, twigs, and other natural materials from your backyard or a nearby park. Using a natural adhesive (or even just placing them together), your child can create little creatures—think acorn owls or twig monsters! This craft promotes fine motor skills while also connecting children with nature. Fun and Edible Crafts 6. Ghostly Bananas and Clementines Materials Needed: Bananas, clementines, chocolate chips. Create a healthy Halloween treat with minimal effort. Peel bananas and cut them in half to form ghostly figures. Use chocolate chips to create eyes. For a fun twist, peel clementines and place a small piece of celery in the top to create mini pumpkins. Not only is this a festive snack, but it’s also a great way to introduce healthy eating during the holiday! 7. Witch’s Brew Jello Cups Materials Needed: Green jello, gummy worms, cups. This spooky dessert is sure to be a hit! Prepare green jello according to package instructions, then pour it into clear cups. Before the jello sets, add gummy worms for a creepy effect. Once set, serve them at a Halloween party or as a fun after-school snack. This craft not only encourages creativity but also introduces basic cooking skills. Interactive and Sensory Crafts 8. Sensory Bin: Halloween Edition Materials Needed: Black rice, plastic spiders, mini pumpkins. Create a sensory bin that delights the senses. Fill a large bin with black rice (you can dye rice with food coloring if you prefer). Add in plastic spiders, mini pumpkins, and other Halloween-themed items. Let your child explore the textures, colors, and sounds as they dig through the rice. This craft provides endless opportunities for imaginative play and sensory exploration. 9. Pumpkin Slime Materials Needed: Glue, baking soda, orange food coloring, contact solution. Make Halloween fun with a gooey pumpkin slime! Combine 1/2 cup of glue with 1/2 cup of water and mix in orange food coloring. In a separate bowl, combine 1/2 teaspoon of baking soda with 1 tablespoon of contact lens solution. Mix the two mixtures together and watch as they transform into slime! This hands-on activity is great for sensory play and helps develop fine motor skills as kids squish and stretch their creations. Decor Crafts for Halloween 10. Yarn-Wrapped Ghosts Materials Needed: Yarn, balloons, and markers. This charming craft is perfect for decorating your home. Inflate small balloons and let your child wrap them in white yarn. Once covered, use a black marker to draw ghost faces. After the yarn is in place, let the balloons deflate, and you’ll have adorable, lightweight ghosts to hang around the house. 11. Paper Mache Jack-o’-Lanterns Materials Needed: Balloons, newspaper, orange paint, and black paint. For a more involved project, try making paper mache jack-o’-lanterns! Inflate a balloon and tear strips of newspaper. Mix equal parts water and flour to create a paste, and have your child dip the newspaper strips into the paste and apply them to the balloon. Once it’s dry, pop the balloon and paint it orange. Use black paint to add spooky faces. These lanterns can be used as decorations or even as candy holders on Halloween night! Educational Crafts 12. Halloween Counting Cards Materials Needed: Cardstock, markers, Halloween stickers. Make learning fun with Halloween-themed counting cards! Cut cardstock into small cards and let your child decorate them with Halloween stickers. Write numbers on each card and encourage your child to count corresponding items (like mini pumpkins or ghosts) that can be placed next … Read more

18 Easy and Creative Bat Craft Ideas for a Spooky Halloween

18 Bat-Inspired Craft Projects

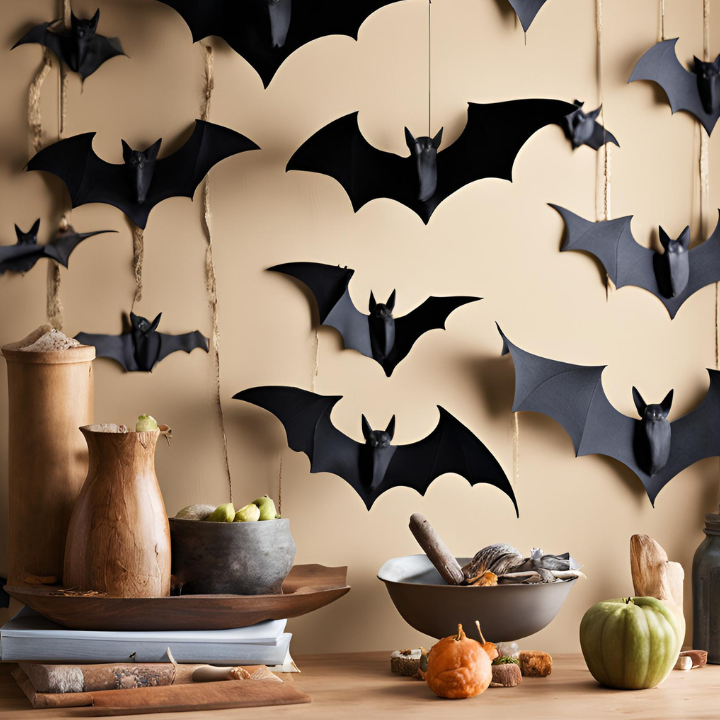
Bat Craft Ideas; As the air turns crisp and the days grow shorter, thoughts of Halloween and all things spooky fill our minds. Among the most intriguing creatures of the night, bats hold a special place in both folklore and our imaginations. They symbolize mystery and transformation, making them perfect subjects for craft projects. In this article, we’ll explore 18 bat-inspired craft projects that are sure to ignite your creativity, provide hours of fun, and add a delightful spooky touch to your home décor. 1. Paper Bat Garland A paper bat garland is a simple yet impactful decoration perfect for sprucing up any Halloween party or home space. Start by using black construction paper or cardstock to cut out bat shapes—look online for free printable templates to keep things consistent. Punch holes in the bat wings and thread twine or ribbon through each one, spacing them evenly. You can opt for a minimalist look or embellish the bats with glitter or stickers for added flair. This project is easy for kids and adults alike, requiring only basic materials and tools. Once your garland is complete, hang it across mantels, windows, doorways, or stair railings to instantly bring a spooky vibe to your home. You can make multiple garlands and layer them for a dramatic effect. For an extra eerie touch, alternate bat sizes or hang glow-in-the-dark bats among the regular ones. If you’re hosting a Halloween event, a few garlands strung around the room create a festive backdrop for photos. The versatility and simplicity of this craft make it a go-to Halloween décor staple. 2. Bat Mobile A bat mobile is a whimsical and engaging decoration that adds movement and intrigue to any space. Start by cutting several bat shapes out of black cardstock or stiff paper. Vary the sizes and wing shapes to create visual interest. Attach each bat to a string at different lengths, then secure them to a lightweight hoop or stick. This variation in height gives the illusion of bats in mid-flight, especially when placed near a fan or open window. Hang your bat mobile above a table, in a hallway, or from a ceiling light fixture for maximum effect. You can personalize it with glow-in-the-dark paint or metallic markers for added flair. Consider using fishing line for an invisible hanging effect that makes the bats appear to float. This mobile can also serve as a fun educational craft, helping children understand balance and symmetry. It’s a spooky yet sophisticated decoration for Halloween or bat-themed parties. 3. Bat Masks Creating bat masks is an exciting way to get kids into the Halloween spirit while encouraging their creativity. Begin by printing or sketching a bat mask template onto sturdy paper or lightweight cardboard. Once cut out, kids can decorate their masks with a wide variety of materials such as markers, glitter, sequins, or even faux fur. Punch holes on the sides and tie elastic string or ribbon to wear them comfortably. These masks can serve both as costume accessories and imaginative play props. To elevate the experience, host a bat masquerade or costume contest where each child shows off their unique creation. For added realism, encourage kids to look up images of different bat species and incorporate details into their designs. If you’re crafting with older kids or adults, consider adding more complex embellishments like feathers or fabric overlays. This project helps build fine motor skills and self-expression. Plus, it’s a creative way to blend art with a little Halloween mystery. 4. Bat Wreath The bat wreath is a striking Halloween door or wall decoration that welcomes guests with spooky charm. Use a foam or cardboard ring as the base, which can be painted black or covered in fabric. Cut out several bats from cardstock, felt, or foam and glue them around the wreath to form a dynamic, circular pattern. Arrange them so the wings overlap or appear mid-flight for added motion. Finish the wreath with ribbons, faux spider webs, or Halloween-themed charms. This is a great project for group crafting, allowing multiple participants to contribute different bat styles or additional embellishments. You can make it as minimalist or elaborate as you’d like, depending on your theme. Try layering materials such as lace or mesh to add texture and dimension. If using outdoors, be sure to weatherproof your materials for durability. Your finished wreath is sure to become a spooky favorite each Halloween season. 5. Puppet Bats Puppet bats offer a playful way for kids to explore storytelling and performance. Cut bat shapes from felt or cardstock, and glue them to popsicle sticks or craft dowels to create your puppets. Add googly eyes, tiny fangs, or wings that flap using paper fasteners. Kids can then put on mini puppet shows using their bat characters in spooky or silly Halloween tales. These puppets are perfect for classrooms, storytime, or party entertainment. Encourage children to create names and backstories for their puppet bats, fostering both imagination and narrative thinking. To store or display the puppets, create a “bat cave” box using a decorated shoebox. This craft also introduces basic construction skills like cutting, gluing, and designing movable parts. For variety, create a whole cast of characters including witches, pumpkins, and friendly ghosts. It’s an easy, mess-free project that provides hours of fun. 6. Bat Bookmarks Bat bookmarks are a fun and functional craft that encourages reading with a spooky twist. Start by cutting bat shapes from cardstock in black, purple, or other Halloween colors. Punch a hole at the top and thread a ribbon or yarn through it for easy use. You can add fun touches like glitter, glow-in-the-dark paint, or small sticker eyes. These bookmarks are great for giving away as party favors or classroom treats. Personalize each one with names or favorite quotes to make them special gifts for book lovers. Kids can make themed bookmarks for their favorite stories or Halloween books. Teachers can incorporate this craft into reading activities during October to keep young … Read more

14 Creative Pumpkin Carvings for Spooktacular Kitty

14 Creative Pumpkin Carvings for Spooktacular Kitty

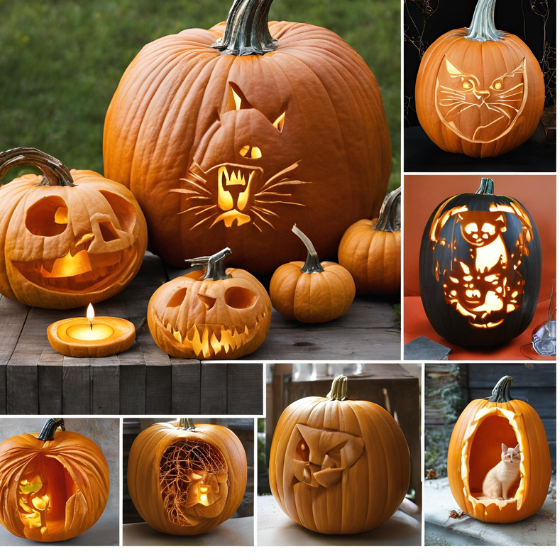
Pumpkin Carvings; As Halloween approaches, the air fills with excitement, and homes are adorned with spooky decorations. Among the traditions of the season, pumpkin carving stands out as a beloved activity for all ages. This year, let’s add a delightful twist to your pumpkin carving by incorporating the charming world of Hello Kitty. With her iconic bow, playful expressions, and adorable designs, Hello Kitty transforms pumpkins into whimsical masterpieces. In this blog, we will explore 14 creative pumpkin carving ideas inspired by our favorite feline, ensuring that your Halloween celebrations are nothing short of purr-fect! Section 1: Hello Kitty Basics What is Hello Kitty? Hello Kitty, the iconic character created by Sanrio in 1974, has captured the hearts of millions worldwide. With her simple design—a small white cat with a red bow—she embodies cuteness and charm. Over the years, Hello Kitty has become a cultural phenomenon, inspiring merchandise, media, and even themed events. This Halloween, why not pay homage to this beloved character by incorporating her into your pumpkin carving? Pumpkin Carving Essentials Before diving into the creative ideas, it’s essential to gather your tools and prepare for the carving process. Here are some must-haves: Section 2: Creative Pumpkin Carving Ideas 1. Classic Hello Kitty Face Start your pumpkin carving journey with the timeless classic: Hello Kitty’s face. Instructions: 2. Hello Kitty with Pumpkin Take creativity to another level by designing Hello Kitty holding or sitting on a smaller pumpkin. Instructions: 3. Hello Kitty in a Witch Costume Celebrate the Halloween spirit with a witch-themed Hello Kitty. Instructions: 4. Hello Kitty Ghost Combine spooky and cute with a ghostly version of Hello Kitty. Instructions: 5. Hello Kitty Bat Bring a bit of whimsy to Halloween with a Hello Kitty bat design. Instructions: 6. Hello Kitty in a Pumpkin Patch Create a delightful scene featuring Hello Kitty in a pumpkin patch. Instructions: 7. Hello Kitty with Friends Incorporate Hello Kitty’s friends for a lively carving experience. Instructions: 8. Hello Kitty Day of the Dead Embrace a colorful celebration with a Day of the Dead-inspired Hello Kitty. Instructions: 9. Hello Kitty Unicorn Combine the magic of unicorns with Hello Kitty’s charm for a whimsical pumpkin. Instructions: 10. Hello Kitty Scarecrow Add a playful twist by transforming Hello Kitty into a scarecrow. Instructions: 11. Hello Kitty in a Haunted House Capture the essence of Halloween with a spooky scene of Hello Kitty in a haunted house. Instructions: 12. Hello Kitty Pumpkin Spice Celebrate the flavors of fall with a pumpkin spice-themed Hello Kitty. Instructions: 13. Hello Kitty in a Cauldron Embrace the spooky season with Hello Kitty brewing potions in a cauldron. Instructions: 14. Hello Kitty Vampire Complete your pumpkin carving journey with a cute vampire version of Hello Kitty. Instructions: Section 3: Finishing Touches Lighting Your Pumpkins Once your pumpkins are carved, it’s time to light them up! Consider using: Displaying Your Creations Showcase your carved pumpkins in a way that enhances their charm. Here are some tips: Conclusion With these 14 creative pumpkin carving ideas, you can celebrate Halloween with a delightful Hello Kitty twist. Each design allows for personal creativity and can be a fun project to share with family and friends. As you carve, remember to embrace the joy of the season, and don’t hesitate to share your creations with others. Whether you prefer classic designs or whimsical scenes, let your imagination run wild, and make this Halloween a truly spooktacular one! Additional Resources Happy carving!

24 Jack-o’-Lantern Designs for Every Mood

24 Jack-o'-Lantern Designs for Every Mood

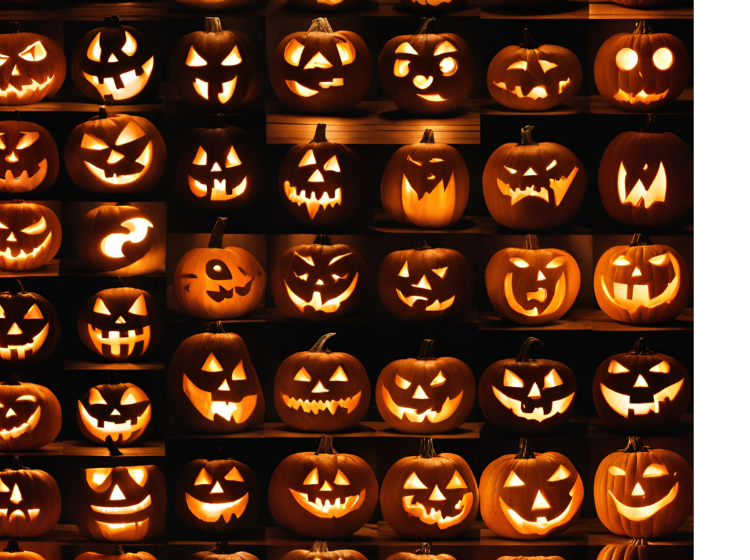
Jack-o’-Lantern designs; As Halloween approaches, the excitement of carving Jack-o’-Lanterns fills the air. These iconic symbols of the season not only light up our porches but also express creativity and fun. Whether you’re a seasoned carver or trying it for the first time, there’s a design to match every mood and theme. In this article, we’ll explore 24 Jack-o’-Lantern designs, categorized by mood, to inspire your Halloween festivities. Classic and Traditional Designs 1. The Classic Grinning Pumpkin Nothing says Halloween quite like a classic Jack-o’-Lantern with a friendly grin. This design features a simple smile and triangle-shaped eyes, making it perfect for beginners. Start by selecting a medium-sized pumpkin and use a sharp knife to cut off the top. Scoop out the seeds and pulp, then use a carving tool or a small knife to create the facial features. This timeless design embodies the spirit of Halloween, inviting trick-or-treaters to your doorstep with a warm, welcoming glow. 2. The Scary Ghoul For those looking to add a touch of fright to their Halloween décor, the scary ghoul Jack-o’-Lantern is an excellent choice. This design features jagged teeth and sunken eyes, creating a truly menacing expression. To enhance the fear factor, place a flickering candle inside the pumpkin, casting eerie shadows. When carving, pay attention to the details in the eyes and mouth to make your ghoul truly spine-chilling. 3. The Ghostly Pumpkin Transform your pumpkin into a spectral figure with a ghostly face. This design typically features elongated features and a haunting expression. To achieve the best effect, consider using white LED lights instead of traditional candles for a more ethereal glow. You can also sprinkle some glitter on the surface to add a magical touch. This design is perfect for those who want to create an otherworldly ambiance in their front yard. Whimsical and Fun Designs 4. The Silly Monster Bring a smile to everyone’s face with a silly monster Jack-o’-Lantern. This design can include oversized googly eyes and a goofy grin, appealing to children and adults alike. Use brightly colored paint to add additional features, like colorful horns or wild hair, to enhance the whimsical nature of this pumpkin. This design is a great project for families, allowing kids to unleash their creativity. 5. The Happy Cat If you’re a cat lover, this cute cat face Jack-o’-Lantern is perfect for you. With pointy ears, whiskers, and big, bright eyes, this design is both charming and simple to carve. Start with a round pumpkin and create a triangle shape for each ear at the top. Use a carving knife to define the features, and you can even paint the pumpkin in shades of black or orange for a festive touch. 6. The Playful Owl Owls are synonymous with wisdom and mystery, making them a wonderful subject for a Jack-o’-Lantern. Carve big, expressive eyes and a beak to create an adorable owl face. You can add texture by carving feather patterns on the sides of the pumpkin. For an extra element, consider placing the owl on a branch or incorporating other fall decorations around it. Artistic and Creative Designs 7. The Floral Fantasy For those with a more artistic flair, the floral fantasy design offers an opportunity for intricate carving. Create a pattern of flowers and vines winding around the pumpkin. Use a Dremel tool for detailed work, allowing for depth and dimension in your design. This elegant approach not only showcases your carving skills but also brings a touch of sophistication to your Halloween décor. 8. The Celestial Pumpkin Let your imagination soar with a celestial pumpkin featuring stars, moons, and even planets. Carve a night sky filled with various celestial bodies, and consider using glow-in-the-dark paint to make your design pop after dark. This creative approach is perfect for astronomy lovers or anyone wanting to capture the magic of the night sky during Halloween. 9. The Nature Scene Bring the beauty of the outdoors inside with a nature scene carved into your pumpkin. Create a picturesque landscape featuring trees, mountains, or even a sunset. Layer your carving for depth, and experiment with different lighting techniques to highlight the details. This design not only showcases your creativity but also connects Halloween with the beauty of nature. Themed and Pop Culture Designs 10. The Superhero Symbol Celebrate your favorite superhero by carving their emblem into a pumpkin. Whether it’s Superman’s “S,” Batman’s bat symbol, or Wonder Woman’s logo, these designs allow you to pay homage to beloved characters. Use reference images for accuracy, and consider adding colored lights inside the pumpkin to match your hero’s colors. 11. The Movie Monster Horror film enthusiasts will love the movie monster Jack-o’-Lantern design. Carve iconic characters like Dracula, Frankenstein, or the Mummy. These recognizable figures are sure to delight fellow fans. Use sharp tools to capture the details, and consider creating a themed display with props from your favorite films for added impact. 12. The Cartoon Character Bring your favorite animated character to life with a Jack-o’-Lantern design. Whether it’s Mickey Mouse, SpongeBob, or a classic Disney princess, these designs can be a hit with kids and adults alike. Opt for simpler designs for easier carving, and let your personality shine through by adding unique touches that represent your character. Spooky and Eerie Designs 13. The Creepy Spider Add an extra layer of fright to your Halloween décor with a creepy spider design. Carve a large spider with intricate details and long, hairy legs. To elevate the scare factor, add real or faux spider webs around the pumpkin. Place it on your porch or hang it from a tree to give it a sense of motion. 14. The Witch’s Face Channel the classic image of a witch with a pumpkin that features a crooked nose and a pointy hat. This design allows for creativity; you can add fun accessories, like a broomstick or a cauldron. Incorporate green or purple paint to make your witch come alive, creating a magical yet spooky atmosphere. … Read more

18 Days of Halloween Door Decor: Spookify Your Entry One Day at a Time

18 Days of Halloween Door Decor

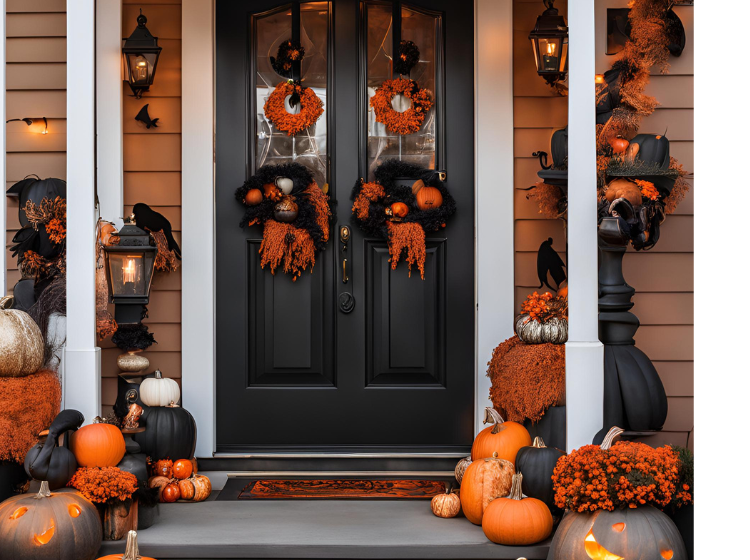
Halloween Door Decor; As the leaves change color and the air turns crisp, Halloween beckons with its charm and mystery. One of the most delightful ways to embrace the spirit of the season is through door decor. Your front door is the gateway to your home, and dressing it up for Halloween not only sets the tone for the holiday but also brings joy to neighbors and visitors alike. In this article, we’ll explore 18 creative and festive ideas for decorating your door, ensuring that it stands out this Halloween. Day 1: Classic Spooky Kick off your Halloween with a time-honored spooky setup that captures the essence of the season. Using traditional black and orange as your palette, this look instantly signals Halloween fun. A black wreath wrapped in orange ribbon draws the eye and serves as the focal point. Add faux spiders and glittery touches to amplify the eerie ambiance. To make your door pop even more, add matching black and orange doormats or hanging lanterns. Drape black cheesecloth or mesh around the edges for a haunted house feel. Small jack-o’-lantern accents or a crow perched above the wreath can complete the look. This design is simple to put together yet visually impactful. Day 2: Ghostly Greetings Create a door that appears to be haunted with floating ghost decorations. Lightweight white fabric or cut-up sheets bring these spooky spirits to life. Draw expressive or silly ghost faces to give them personality. Let them sway gently with the wind for an extra-creepy effect. Enhance the vibe by adding soft white lights around the door to illuminate your ghost friends at night. A “Boo!” sign in black letters can add a bold statement to the setup. Consider layering your ghosts at different heights for depth. This approach is fun, affordable, and easy for the whole family to help with. Day 3: Pumpkin Paradise Nothing says Halloween quite like a colorful array of pumpkins. Line your doorway with a variety of real or faux pumpkins in assorted sizes and hues. Paint some in metallic or pastel tones for a modern twist, or carve expressive faces for a classic touch. Layer in hay bales and autumn leaves for added seasonal charm. Consider stacking smaller pumpkins vertically for visual interest. Tuck in battery-operated tea lights to make your display glow after dark. You can also add signage like “Pumpkin Patch” to tie everything together. This cheerful theme blends fall harvest vibes with festive flair. Day 4: Witch’s Welcome Channel the fun and mystery of a friendly neighborhood witch with this whimsical display. Place a broom leaning beside your door and hang a witch hat right above. Add a plastic or paper cauldron filled with treats or Halloween trinkets. Faux potion bottles and glittery bats can add extra personality. To take it further, drape a faux shawl or cloak over the door for a witchy silhouette. Use green or purple LED lights to enhance the magical vibe. Small spell books or a black cat figure can make fun additions. This setup invites trick-or-treaters with a wink and a cackle. Day 5: Monster Mash Add a splash of fun with a giant cartoon-style monster face right on your front door. Use bright-colored paper to cut out big teeth, goofy eyes, and even a silly tongue. Secure everything with removable tape or adhesive strips. The oversized features are sure to make passersby smile. For added flair, you can add monster arms around the doorframe to make it feel like a real creature is coming to life. Glow-in-the-dark eyes or fangs make for a fun nighttime effect. This theme is perfect for homes with young kids. It’s playful, budget-friendly, and full of personality. Day 6: Haunted House Entrance Give your doorway a frightful makeover with a haunted house theme. Fake cobwebs and strategically placed skeletons will make your entryway delightfully eerie. Use mini tombstones to create a path leading up to the door. Add flickering LED candles for a moody nighttime effect. Hang old picture frames with ghostly silhouettes or creepy portraits for a haunted hallway illusion. Torn curtains or gauze fabric can add a tattered, aged look to your door. Use a “Beware!” sign to set the tone before guests even knock. This chilling display is sure to be a hit on Halloween night. Day 7: Creepy Crawly If spiders give you the creeps, lean into that fear with a spider-themed door. Cover the door with stretched fake webs and scatter plastic spiders throughout. Position larger spiders crawling up the sides for a dramatic effect. A spider-patterned doormat ties the theme together. Add dimensional texture with spider decals or wall clings on adjacent siding. Consider using a large spider prop above the door for a big scare. Soft backlighting will give the web a glowing, ghostly appearance. This decor is simple to execute but creates high impact. Day 8: Enchanted Forest Turn your entryway into a magical woodland hideaway with moss and fairy lights. Attach faux moss around your doorframe to mimic an overgrown, hidden forest. Twinkling lights provide a gentle, dreamy glow that enchants guests. Add mini toadstools, woodland animals, or even fairy figurines for detail. Drape soft green and brown fabrics to mimic vines and earthy textures. Hang a small “Enter the Enchanted Forest” sign to invite wonder. Place a few logs or acorns at the foot of the door to complete the natural theme. This decor is perfect for those who love a magical, storybook touch. Day 9: Skeleton Showdown Go bold with bony decor by featuring skeletons as your door’s main attraction. Position one sitting in a chair beside the door and another peeking from behind it. String white lights around the frame to make your skeletons pop at night. Use black cloth to create a spooky curtain backdrop. Add accessories like sunglasses, hats, or signs to give each skeleton personality. Pose them as though they’re mid-conversation or welcoming guests with bony high-fives. You can even add a skeleton pet for extra … Read more

15 Halloween Décor Ideas for a Chic Celebration

15 Halloween Décor Ideas for a Chic Celebration

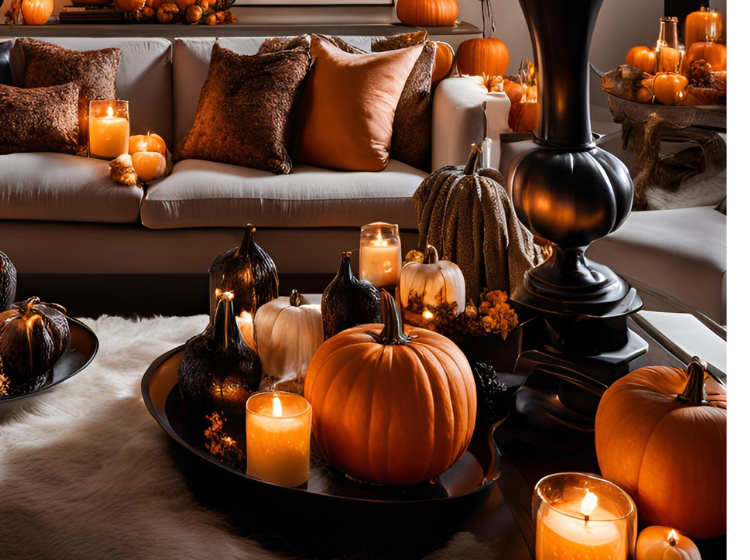
Halloween Décor Ideas; Halloween is often associated with spooky ghosts, witches, and an abundance of orange and black. However, who says you can’t celebrate the holiday with a touch of elegance? With a few chic décor ideas, you can transform your home into a stylish, sophisticated space that captures the essence of Halloween without sacrificing aesthetics. In this article, we’ll explore 15 fabulous décor ideas that will help you create a chic celebration that’s sure to impress your guests. Choosing a Color Palette and Theme 1. Choosing a Color Scheme A cohesive color palette is the backbone of any stylish décor. For a chic Halloween, consider a combination of black, white, gold, and deep jewel tones like emerald green or ruby red. These colors evoke a sense of elegance while still nodding to traditional Halloween hues. To incorporate this palette, think about how you can blend these colors throughout your décor. For example, use black tablecloths with gold accents or deep purple flowers in white vases. This balanced approach allows for a sophisticated look that feels seasonal without being overly thematic. 2. Selecting a Theme Once you’ve established your color scheme, the next step is to choose a theme. Whether you opt for gothic elegance, an enchanted forest, or vintage Halloween, your theme will guide your décor choices. For instance, if you choose a gothic theme, think about rich textures like velvet and lace paired with ornate candle holders. An enchanted forest theme might feature natural elements like branches and moss combined with twinkling fairy lights. Each theme can help you create a unique atmosphere that captivates your guests. Elegant Table Settings 3. Chic Table Centerpieces The dining table is often the focal point of any gathering, and Halloween is no exception. To create a stunning centerpiece, consider using a mix of seasonal flowers and elegant props. For example, a tall, black candlestick holding a dark candle can be surrounded by a lush arrangement of deep red roses and black dahlias. Incorporating elements like metallic pumpkins or glass apothecary jars filled with candy can add an extra touch of chicness. The key is to balance the traditional Halloween motifs with modern design elements to create an eye-catching display. 4. Stylish Tableware Your choice of tableware can elevate your Halloween dinner from casual to chic. Look for elegant plates and glassware that complement your color palette. For instance, white porcelain plates with gold trim can provide a classic backdrop, while black glassware adds a contemporary twist. Layer your table settings with textured table runners or lace overlays to create depth and interest. This thoughtful arrangement not only looks beautiful but also enhances the dining experience. 5. Creative Place Cards Add a personal touch to your table setting with unique place cards. Instead of traditional paper cards, consider using mini pumpkins as a base. Simply paint or label each pumpkin with the guest’s name using elegant calligraphy. This small detail not only serves as a place card but also ties into your overall décor, enhancing the chic atmosphere. Alternatively, use black or gold name tags tied with satin ribbon for a more classic touch. Festive Lighting 6. Mood-Setting Lighting Lighting is crucial for setting the mood, especially during an evening celebration. For a chic Halloween, consider incorporating a mix of soft lighting sources. String lights can be draped across tables or hung from doorways to create a warm, inviting glow. Use lanterns with flickering candles (real or LED) placed throughout your space to add an element of sophistication. Dim the overhead lights to create an intimate ambiance that complements your elegant décor. 7. DIY Decorative Lanterns Creating your own decorative lanterns can be a fun and rewarding project. Start with glass jars or lanterns and fill them with seasonal elements like black feathers, twinkling fairy lights, or mini pumpkins. To add an elegant touch, consider painting the jars with frosted spray paint, allowing just enough light to shine through. This DIY project not only adds a personal element to your décor but also serves as a beautiful lighting source for your Halloween celebration. Wall and Surface Décor 8. Artful Wall Hangings Elevate your Halloween décor with artful wall hangings that add a sophisticated touch. Consider incorporating framed prints that feature abstract skulls, elegant bats, or muted Halloween-themed artwork. You can create a gallery wall that combines seasonal art with your regular décor, making it feel intentional and chic. Don’t forget to use matching frames to maintain a cohesive look throughout your space. 9. Stylish Wreaths Wreaths are a classic way to welcome guests, but they don’t have to be made of traditional autumn leaves. Consider creating a chic Halloween wreath using black feathers, metallic accents, or even fresh flowers in your chosen color palette. You can easily make a DIY wreath by starting with a grapevine or foam base and attaching your chosen elements with hot glue. Hang your stylish creation on your front door to set the tone for your chic celebration. 10. Themed Accent Pieces Incorporate small decorative items that reflect your chosen theme and color palette. Think about using chic pumpkins in various sizes and finishes—perhaps some painted in matte black, others in metallic gold. Vintage apothecary jars filled with colored candies or seasonal elements can serve as stylish accents on tables and shelves. The key is to arrange these pieces thoughtfully, creating visual interest without overcrowding your space. Outdoor Décor 11. Sophisticated Porch Displays Your porch is the first impression guests will have of your Halloween celebration, so make it count! Create a welcoming display that combines elegance with a touch of spookiness. Consider using a mix of potted plants, stylish lanterns, and tasteful decorations that fit your color palette. For example, arrange black and white pumpkins on a chic table, surrounded by fairy lights to create an inviting atmosphere. 12. Elegant Pumpkins Pumpkins don’t always have to be carved to look festive. Get creative with your pumpkin décor by painting them in chic colors or using … Read more